Traveling With Your Bike: The Complete Guide to Flying, Shipping, and Trains
20+ years testing gear in Colorado backcountry
How to Travel With a Bike: The Short Answer
To travel with a bike, you pack it into a case or box, hand it over as standard checked baggage or to a bike-shipping service, and rebuild it at the other end with a small tool kit. Most large US carriers now charge ordinary bag fees rather than bike fees. The hard part is packing, not policy.
This article contains affiliate links. We may earn a commission if you make a purchase through our links, at no extra cost to you.
Bike travel used to be a genuinely bad deal. A decade ago, a $150 one-way "bicycle fee" was normal, and riders spent real energy disguising bike cases as band equipment. That era is mostly over in the United States. The fees came down, the rules got clearer, and the friction moved somewhere else: to packing, to airport security, and to the twenty minutes on the far side when you discover you left the pedal wrench at home.
The airline is no longer the expensive part of flying with a bike. Your own packing decisions are.
This guide is the hub for everything we know about getting a loaded bikepacking rig from your garage to a trailhead in another time zone. Work through it in order the first time. After that, treat it as a checklist. If you are still deciding where to go, our guide to planning your first bikepacking trip pairs well with this one, because route choice and travel logistics constrain each other more than most riders expect.
What Airlines Actually Charge to Fly a Bike
Start with the number, because it drives every other decision. On most large US carriers, a bike now flies as ordinary checked baggage. According to Delta's sporting equipment policy, standard baggage allowance and fees apply based on cabin and travel region, bicycles that exceed 50 lbs incur excess weight charges, and bikes cannot exceed 115 linear inches (292 cm) or weigh 100 lbs or more. Delta also requires bikes to be packed in a durable protective container designed specifically for bicycles, and a soft-sided travel bag requires a signed limited release form.
That last detail matters more than the fee. A limited release form is you agreeing, in writing, that the airline is not on the hook for what happens inside a soft bag.
Other carriers follow similar logic with different numbers. According to American Airlines' special items and sports equipment page, bicycles travel for standard checked bag fees up to 50 lbs, with standard overweight fees applying from 51 to 70 lbs and no oversize fee. According to Orucase's 2026 Alaska Airlines guide, Alaska treats bikes as standard checked baggage when the packed case stays under 115 linear inches and 70 lbs. And according to Orucase's 2026 Southwest guide, a bike case under 80 linear inches and 50 lbs travels as normal checked baggage, while a larger case triggers a $75 sports equipment fee and overweight cases run $100 from 51 to 70 lbs and $200 from 71 to 100 lbs.
All of those figures are current as of August 2026 and all of them can change without much notice, which is why we keep a running breakdown of airline bike fees and policies rather than trusting a number we memorized two seasons ago.
Cases, Bags, and Boxes: What to Put Your Bike In
There are four real options, and they trade protection against size, weight, and cost.
- A cardboard bike box from a local shop is free, disposable, and surprisingly effective for one-way trips. It is also enormous, dies in rain, and gives you nothing to do with it at the far end.
- A soft bag with internal padding weighs the least, folds into a hotel closet, and rolls well. It offers the least crush protection, and as Delta's policy shows, it can require a limited release form that waives damage liability.
- A hard case is the tank option: molded shell, wheels, latches, real protection. It also weighs 20 to 30 lbs empty, which eats into a 50 lb allowance fast.
- A compact case built to stay inside standard luggage dimensions is the clever option. According to Tree Fort Bikes' listing for the S&S Backpack Travel Case, the case measures 26 x 26 x 10 inches, which is exactly 62 linear inches and therefore sits at the standard airline suitcase limit rather than the oversize one.
The empty weight of the case is the number riders underestimate. A 27 lb hard case plus a 24 lb bikepacking rig is 51 lbs before you add a single tool. Weigh your case at home on a bathroom scale, subtract from your carrier's limit, and you will know instantly how much of your kit can ride inside.
We go deeper on shell materials, wheel quality, and internal padding systems in our roundup of the best bike travel cases for bikepacking. For the bags that stay on the bike, our complete guide to bikepacking bags and storage covers what fits where once you are actually riding.
Packing the Bike
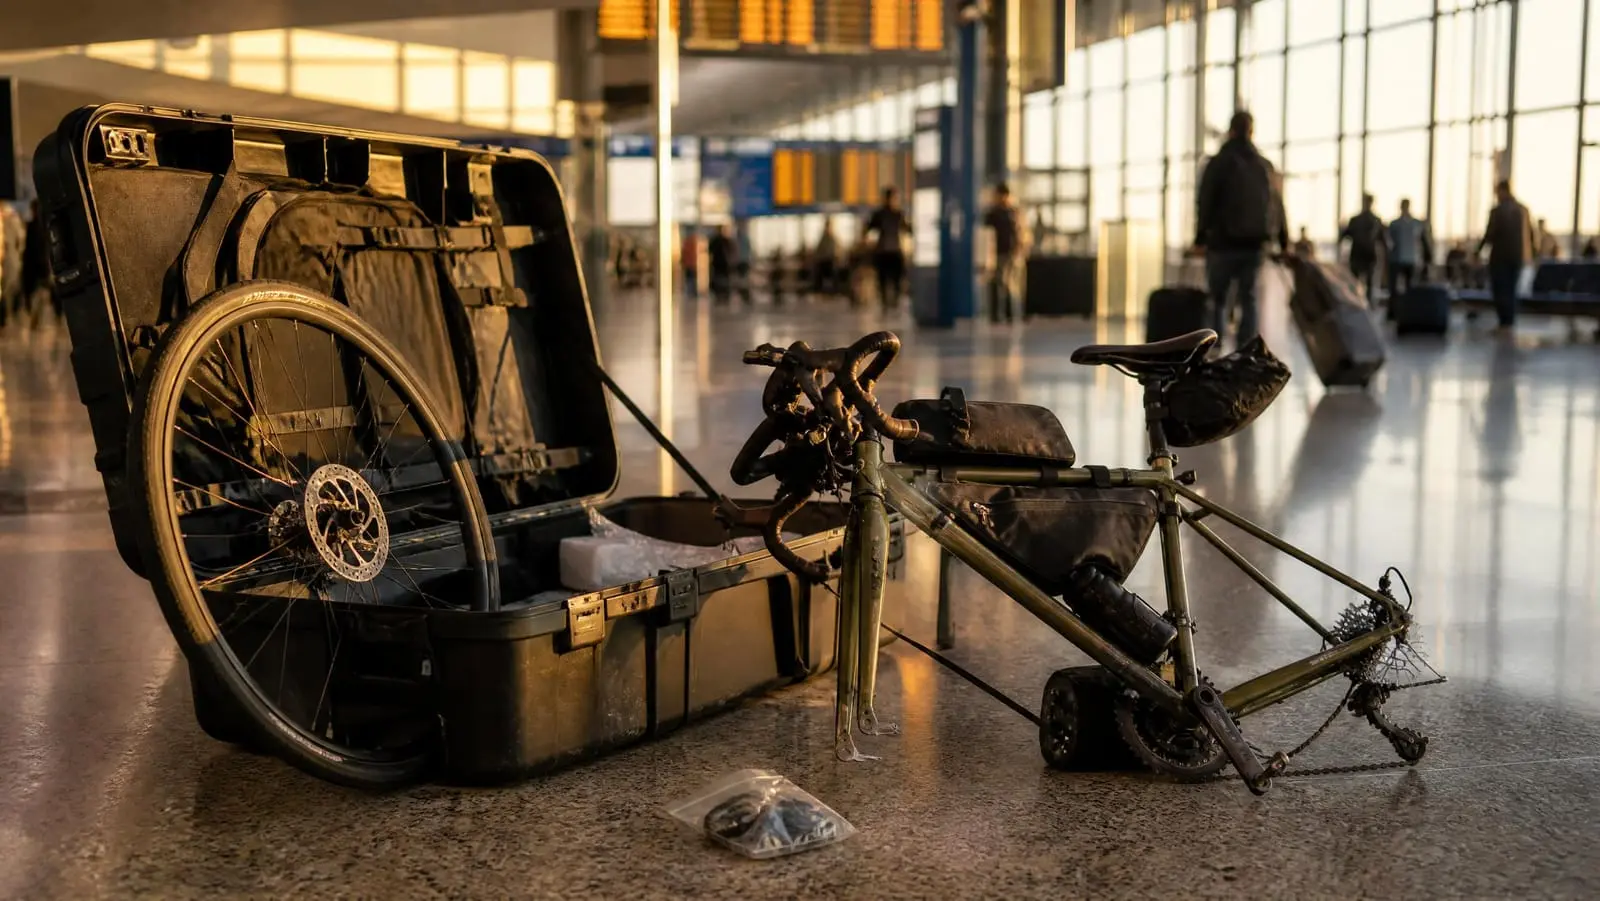
Packing is a repeatable sequence, not an art. Learn it once and it takes 35 minutes.
- Photograph the assembled bike from both sides, plus close-ups of the seatpost height, stem spacer stack, and derailleur adjustment. This is your rebuild reference and your damage evidence.
- Shift to the smallest cog to pull the rear derailleur inboard, then remove the derailleur entirely and bag it, still attached to the cable, taped to the chainstay. A sheared derailleur hanger is the single most common flight injury.
- Remove pedals (remember the left pedal is reverse-threaded), wheels, seatpost, and handlebars. Mark your seatpost height with tape before it moves.
- Deflate tires partially. They do not explode at altitude in a pressurized hold, but a soft tire packs flatter and absorbs impact better.
- Protect the fork and dropouts with axle spacers or a length of dowel. An empty fork that gets squeezed is a bent fork.
- Pad every tube-to-tube contact point with pipe insulation or foam, and separate the wheels from the frame with a rigid divider.
- Zip-tie loose parts to the frame so nothing migrates in transit, and put small hardware in one labeled bag.
Then weigh the closed case. Then photograph the closed case.
This is the section where the internet will hand you forty conflicting opinions, so we treat how to pack a bike for flying as its own dedicated walkthrough with photos. The shortcut version: anything that can rotate, snag, or lever will do exactly that in a baggage hold.
Cross-check your load against our bikepacking packing list and checklist before you close the lid, because the case is the one moment where every item you own has to be accounted for in one place.
Shipping the Bike Instead of Flying With It
Sometimes the best way to travel with a bike is to not travel with it. Bike-specific shipping services pick the bike up at your house or a local shop and deliver it to a shop, hotel, or trailhead lodge near your start.
The economics are closer than most riders assume. According to Red Stag Fulfillment's 2026 cost breakdown, most riders pay roughly $60 to $120 one way to ship a standard adult bike through a specialty service such as BikeFlights or ShipBikes, and according to Fulfyld's shipping rate guide, those services typically price 25 to 40 percent below UPS and FedEx retail rates. Red Stag's own quotes put a coast-to-coast ground shipment at roughly $100 to $120; expedited air service, e-bikes, and oversized boxes cost considerably more. Set that against a checked-bag fee plus a rental car big enough to hold a bike case, and shipping frequently wins outright.
Shipping is clearly better when:
- You are flying with carry-on only and do not want a case following you around.
- Your route is a point-to-point, so the case would otherwise need shuttling to the finish.
- You are connecting through two or more airports, where each transfer is another chance for a mishandled oversize bag.
- You want a shop to receive, unpack, and check the bike before you arrive.
Flying with it is better when your trip is short, your schedule is tight, or your start point has no business willing to accept and hold a large box. Ground shipping runs five to nine days on long routes, so a missed pickup window costs you a trip, not an afternoon.
We break down the full math on shipping your bike vs flying with it in a dedicated comparison, including how to find a receiving shop and what to put on the label. If your destination is domestic, our list of beginner-friendly bikepacking routes in the US is a good place to look for trailheads with a bike shop close enough to act as your delivery address.
Your Bikepacking Kit Through Airport Security
The bike is the easy part. The camping kit is where trips get confiscated.
Three rules cover almost everything. First, fuel is banned outright. According to the FAA's PackSafe guidance on fuels, all forms of camp stove fuel are forbidden in both carry-on and checked baggage, including containers and equipment holding residual fuel. That means no canisters, no liquid fuel bottles, and no stove that still smells of white gas. Buy fuel at your destination and plan a stove that runs on something you can actually find there.
Second, compressed gas is banned unless it is provably empty. According to the TSA's entry for CO2 cartridges, only empty compressed gas cylinders are permitted, and it must be clearly visible to the officer that the cylinder is empty. Carry the inflator head, leave the cartridges at home, and buy them on arrival. A mini pump avoids the question entirely.
Third, batteries fly with you, not under you. According to the FAA's PackSafe guidance on lithium batteries, spare lithium-ion batteries and power banks belong in carry-on, batteries up to 100 watt hours are generally allowed, 101 to 160 Wh requires air carrier approval with a limit of two spares per person, and anything above 160 Wh is forbidden. Most bikepacking power banks sit well under that ceiling — a 20,000 mAh pack is roughly 74 Wh — so check the label rather than the marketing copy.
A few smaller items catch people out. Chain lube, sealant, and sunscreen follow the TSA's liquids rule of 3.4 ounces (100 ml) per container in carry-on, so full sealant bottles go in checked baggage or get bought locally. According to the TSA's pepper spray entry, one 4 fl. oz. container of mace or pepper spray is permitted in checked baggage only, and only with a safety mechanism to prevent discharge, which rules out most bear spray canisters on size alone.
We keep a full item-by-item list for flying with bikepacking gear, and it pairs with our complete bikepacking gear guide for deciding what deserves the weight in the first place. Anything on our list of emergency gear every bikepacker should carry that involves gas, fuel, or a large battery needs a plan before you get to the airport, not at the checkpoint.
Rebuilding the Bike at the Other End
Rebuilding takes 30 to 45 minutes if you brought the right five tools, and takes a taxi ride to a bike shop if you did not.
The non-negotiables:
- A pedal wrench or 8 mm hex long enough to get real leverage. Multi-tool hex keys are too short and will round your pedal spindles.
- A torque wrench if you own anything carbon. Seatpost clamps and stem faceplates are where guessing gets expensive.
- A chain tool and quick link, because reinstalling a derailleur invites chain problems.
- A derailleur hanger alignment gauge if you are traveling for more than a week. It is the one specialty tool that turns a ruined day into a five-minute fix.
- A pump with a gauge, since you cannot judge 40 psi by thumb on a loaded gravel tire.
Work in the same order every time: fork and front wheel, rear wheel, derailleur, handlebars, seatpost to your taped mark, pedals, then tire pressure. Shift through the entire cassette before you load a single bag. Then ride 200 meters, brake hard twice, and listen.
What goes in the bike travel tool kit is different from what goes in your on-route repair kit. The travel version is heavier, lives in the case, and never gets carried on the bike. Our guide to building a bikepacking tool kit covers the on-route side, and the two lists overlap by maybe three items.
Trains, Buses, and Ferries
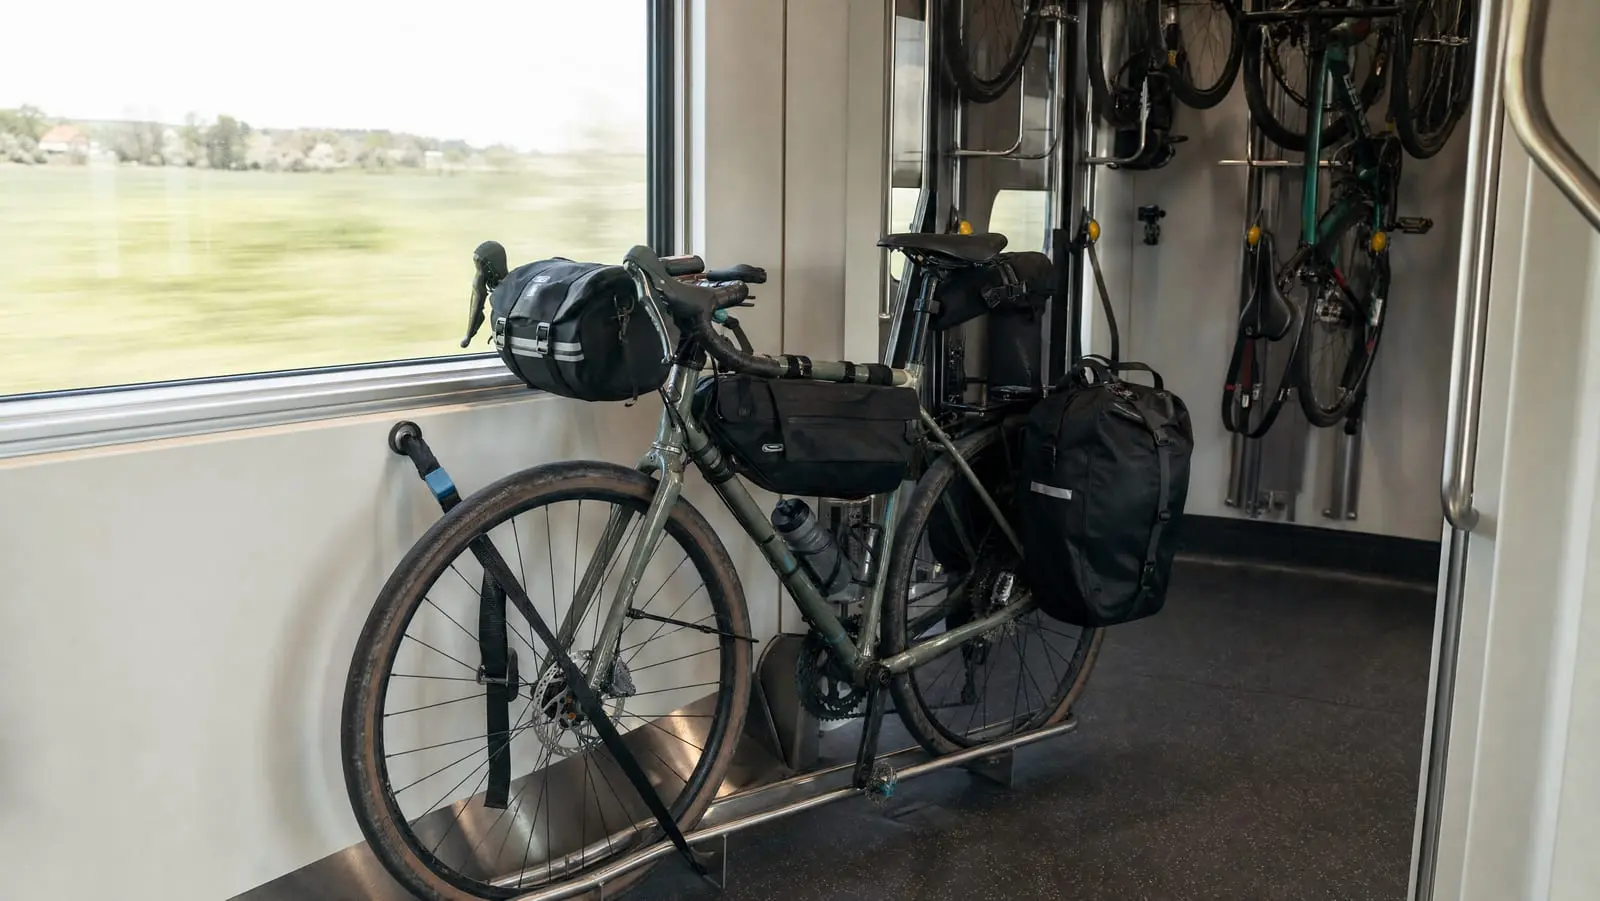
Rail is the most civilized way to move a bike, and in some places the cheapest. In the United States, according to Amtrak's bicycle page, most routes charge a bicycle fee of $20 or less, with fees varying by route and shown in the price summary at booking. Amtrak's racks currently fit standard bikes of 50 lbs or less measuring 70 x 41 x 8.5 inches, folding bikes under 34 x 15 x 48 inches are allowed onboard all trains in lieu of a piece of baggage, and boxed bikes are transferred by crew so you are not responsible for moving them between trains. Those figures are current as of August 2026.
The catch is capacity, not price. Unreserved carry-on bike racks are first come, first served, and when the racks fill, bikes stop being accepted. Reserve the bike space the moment you book the seat.
Europe runs on reservations too. According to Rail Europe's guidance on bikes on trains, Eurostar's bike service costs £45 when booked more than 48 hours before departure from the UK and £60 inside that window, while trains between France, Belgium, the Netherlands, and Germany charge €30 and require both wheels removed and the bike covered in a non-rigid bag no larger than 135 x 85 x 30 cm (as of August 2026). According to Bahnpedia's 2026 breakdown of German rail bike rules, an ICE bike reservation costs about €9 on top of a €9.50 bike ticket, while regional trains run roughly €6 to €9 and are free with the Deutschlandticket in most states.
Buses and ferries are more local and more variable. Intercity coaches often accept a boxed bike as luggage for a flat fee, and ferries frequently carry bikes free or nearly free as foot-passenger accompaniment. Both reward a phone call over a website.
There is enough detail in taking a bike on a train that it earns its own guide, particularly around which US long-distance routes have baggage cars. If you are weighing a rail-based trip against a fully self-supported one, our comparison of bikepacking and bike touring is a useful frame, because trains reward the touring mindset.
Bikes Built to Travel
If you fly with a bike more than three or four times a year, the bike itself becomes a logistics decision.
Couplered frames are the purpose-built answer. S&S couplings split a steel or titanium frame into two halves at the top tube and down tube; the Ritchey BreakAway system does the same job using the seatpost as one coupler and a clamp near the bottom bracket as the other. Either way, the bike packs into a case around 26 x 26 x 10 inches, which as noted above lands at 62 linear inches and dodges oversize handling entirely. You pay for it in frame cost, a modest weight penalty, and five extra minutes at each end.
Small wheels help. A 26 inch or 27.5 inch wheelset packs into a shallower case than 700c, and on a loaded bikepacking rig the handling difference is negligible.
Mechanical over hydraulic is a real consideration for travelers. Mechanical disc brakes tolerate being packed, jostled, and reassembled without any risk of introducing air into a line, and they can be fixed with a hex key in a village that has never seen bleed fluid.
Threaded bottom brackets and standard parts matter more abroad than at home. The more exotic your standards, the smaller the number of shops that can help you.
None of this means you need a dedicated travel bike. Most riders fly a normal frame in a normal case for years without incident. But if you are already shopping, weighting your choice toward travel-friendly bikepacking bikes costs almost nothing and pays off every time you check a bag. Our roundup of the best bikepacking bikes at every budget flags which frames take couplers cleanly.
Rent There or Bring Your Own?
The honest comparison is not cost. It is fit.
Renting removes the case, the packing, the fees, the rebuild, and the risk of arriving to a cracked seatstay. Many bikepacking destinations now have outfitters renting properly equipped gravel and hardtail rigs with bags included. For a long weekend, that is often the right answer, and the total can undercut a round-trip bag fee plus a case purchase.
Bringing your own wins on everything that touches your body. Your saddle, your bar width, your crank length, and your fit are the difference between day four being pleasant and day four being a slog. Rental fleets stock a handful of sizes and a stock saddle. If you have spent a season dialing your position, a rental bike undoes that work in an afternoon.
A middle path works well: rent the bike, bring your own contact points. A saddle, pedals, and a bar tape roll weigh under three pounds and fit in carry-on. Most outfitters will fit your saddle and pedals without complaint if you ask when booking. Bring your own soft luggage too, since rental bag sets are rarely the volumes you have trained with; our breakdown of frame, seat, and handlebar bag systems explains why the mismatch matters on day three.
Two practical checks before you commit to renting a bike abroad. First, confirm the exact frame sizes available and ask for stack and reach numbers, not just "medium." Second, ask what the rental includes for repairs: some outfitters bundle a support number and a replacement bike, and that guarantee is worth more than the bike spec. If you are heading somewhere with limited shop coverage, our bikepacking safety guide covers the self-sufficiency side of that decision.
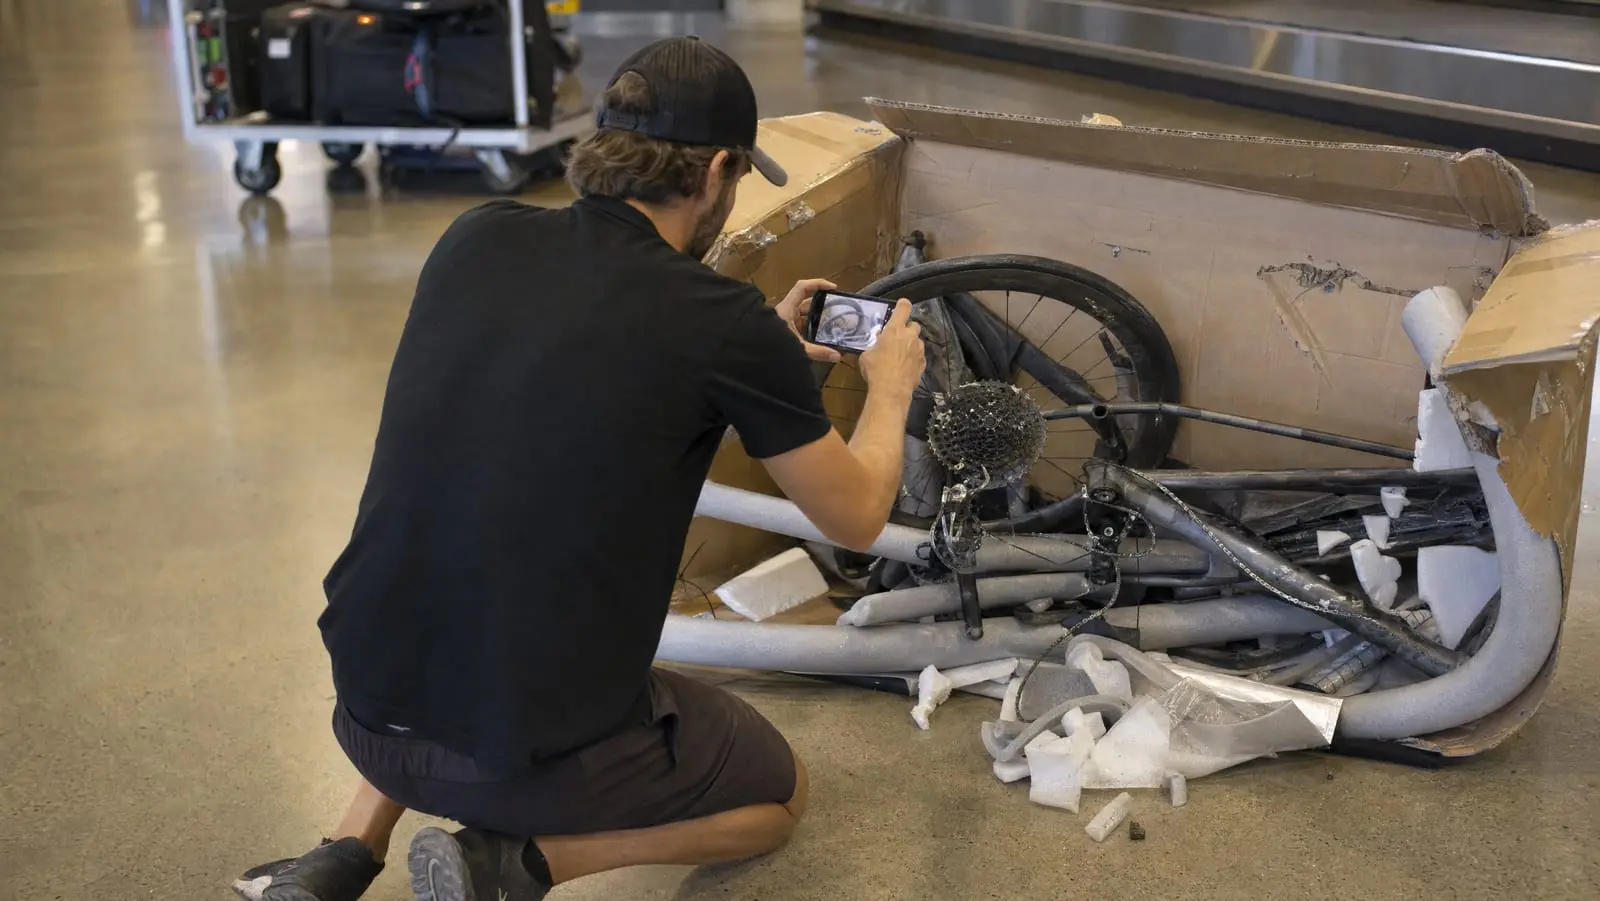
When Your Bike Arrives Damaged
It will happen eventually. What determines your outcome is what you did before the flight and what you do in the first hour after it.
Know the ceiling first. According to the US Department of Transportation, airlines cannot limit liability for provable damage to checked baggage to less than $4,700 per passenger on domestic flight segments using large aircraft, a figure the department revises periodically. On international itineraries the ceiling is lower: according to ICAO, the Montreal Convention baggage limit rose to 1,519 Special Drawing Rights per passenger effective 28 December 2024, which converts to roughly $2,000 depending on the exchange rate. Both are ceilings, not payouts, and both can be undercut by the limited release form you signed for a soft bag.
Do these five things, in this order:
- Open the case before you leave the airport. Many carriers require damage to be reported before you exit the baggage claim area.
- File the claim in person and get a written reference number. A phone call later is a much weaker position.
- Photograph everything including the case exterior, the damage, and your pre-flight photos side by side.
- Get a shop assessment in writing with a repair or replacement quote.
- Submit within the carrier's window, which is often as short as seven days for damage.
This is where bike travel insurance earns its premium. According to Velosurance, a dedicated bicycle policy can cover loss or damage while the bike is being shipped or carried as airline luggage, with an optional extension for travel outside the US and Canada, and Velosurance notes that a homeowners rider typically pays actual cash value rather than replacement cost. For a $4,000 bikepacking rig, the difference between those two figures is usually larger than several years of premiums.
Where to Start
If you are flying with a bike for the first time in the next month, do these four things this week. Check the operating carrier's linear-inch and weight limits and screenshot the page. Weigh your empty case. Do a full practice pack in your garage with a timer running. And pull every fuel canister, CO2 cartridge, and oversized liquid out of your kit before it ever reaches a bag.
Everything else in this guide is refinement. Then go back to the route itself: our trip-planning walkthrough and our gear checklist are the two documents worth rereading the night before you pack. The riders who have miserable travel days are almost never the ones who got a fee wrong. They are the ones who packed at midnight, guessed at a torque spec, and found out at 8,000 feet that the seatpost was two centimeters low. Give the packing the same attention you give the route, and the flight becomes what it should be: the boring part before the good part.
Explore the full series
- Airline Bike Fees and Policies: What It Really Costs to Fly With a Bike — What each major airline charges for a bike, the size and weight limits that matter, and how to avoid an oversize surprise at the counter.
- Best Bike Travel Cases and Bags for Bikepacking: Hard Shell vs Soft Compared — Hard cases, soft bags, and free cardboard boxes weighed against airline fees, storage at the far end, and how much protection a loaded tourer actually needs.
- How to Pack a Bike for Flying: A Step-by-Step Guide — The disassembly order, what to pad and where, and what to do with your bikepacking bags when the bike goes in a box.
- Shipping Your Bike vs Flying With It: Cost, Risk, and When Each Wins — Door-to-door shipping against checked baggage on real numbers, plus the trip shapes where each one is clearly the right call.
- Flying With Bikepacking Gear: TSA Rules for Stoves, Fuel, Batteries, and CO2 — What is allowed in carry-on, what is allowed checked, and what has to be bought at the destination.
- The Bike Travel Tool Kit: Reassembling Your Bike at the Airport — The short tool list that gets a boxed bike rideable in a parking lot, and the torque values worth carrying a wrench for.
- Taking a Bike on Trains, Buses, and Ferries: Amtrak and Beyond — Roll-on services, reservation quirks, and the surface transport that often beats flying for a loaded bike.
- Travel-Friendly Bikepacking Bikes: Couplers, Folders, and Packable Frames — S&S couplers, Ritchey Breakaway, and folding bikes judged on whether they beat an oversize fee often enough to justify themselves.
- Renting a Bike Abroad vs Bringing Your Own: How to Decide — Where rental makes a trip cheaper and simpler, where it ruins the fit, and how to judge a rental outfit from another continent.
- Bike Travel Insurance and Damage Claims: What to Do When Your Bike Arrives Broken — What airline liability actually covers, which policies cover a bicycle, and how to document damage so a claim survives.