The Bike Travel Tool Kit: Reassembling Your Bike at the Airport
20+ years testing gear in Colorado backcountry
What Goes in a Bike Travel Tool Kit
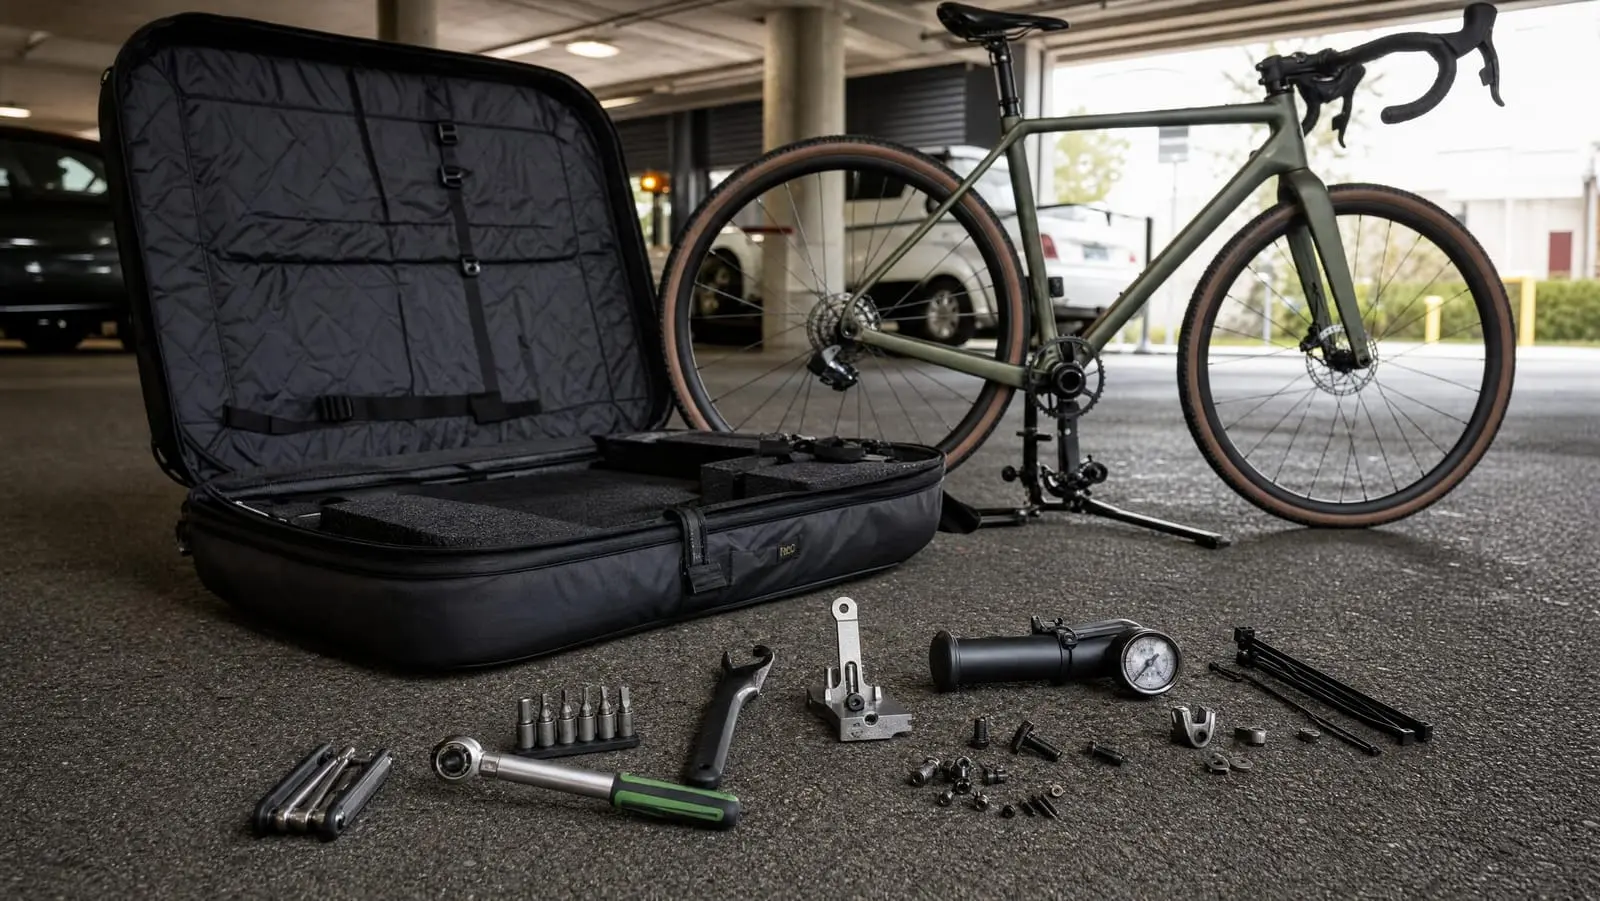
A bike travel tool kit is five tools plus a bag of consumables: a torque wrench, a pedal wrench, a derailleur hanger alignment gauge, a pump with a gauge, and spares cut for your exact frame. It lives in the case, gets used twice per trip, and turns a boxed bike into a rideable one in 30 to 45 minutes.
This article contains affiliate links. We may earn a commission if you make a purchase through our links, at no extra cost to you.
Everything else — the multi-tool, tire levers, plugs and patches — is your on-route kit, and that rides on the bike. Confusing the two is how riders end up in a hotel parking lot at 11pm setting a stem faceplate with a stubby 4 mm key and optimism. If you are still building the plan, start with how to travel with a bike and come back for the tools.
Why the Travel Kit Is Not Your On-Route Repair Kit
The on-route kit is built for grams and for failures that strand you: a flat, a snapped chain, a loose bolt. We covered that build in our guide to building a bikepacking tool kit, and the rule there is ruthless — if it does not earn its weight over 80 miles of washboard, it stays home.
The travel kit gets different rules. It is allowed to be heavy, because it never leaves the case, and allowed to duplicate tools you already own, because whatever you reach for during how to pack a bike for flying has to be in the box when the box gets opened. Pack it while you disassemble, not after.
The travel kit gets used twice per trip, weighs more than anything you would ride with, and is the only reason the first ride starts on time.
Torque Matters More on the Road Than in Your Garage
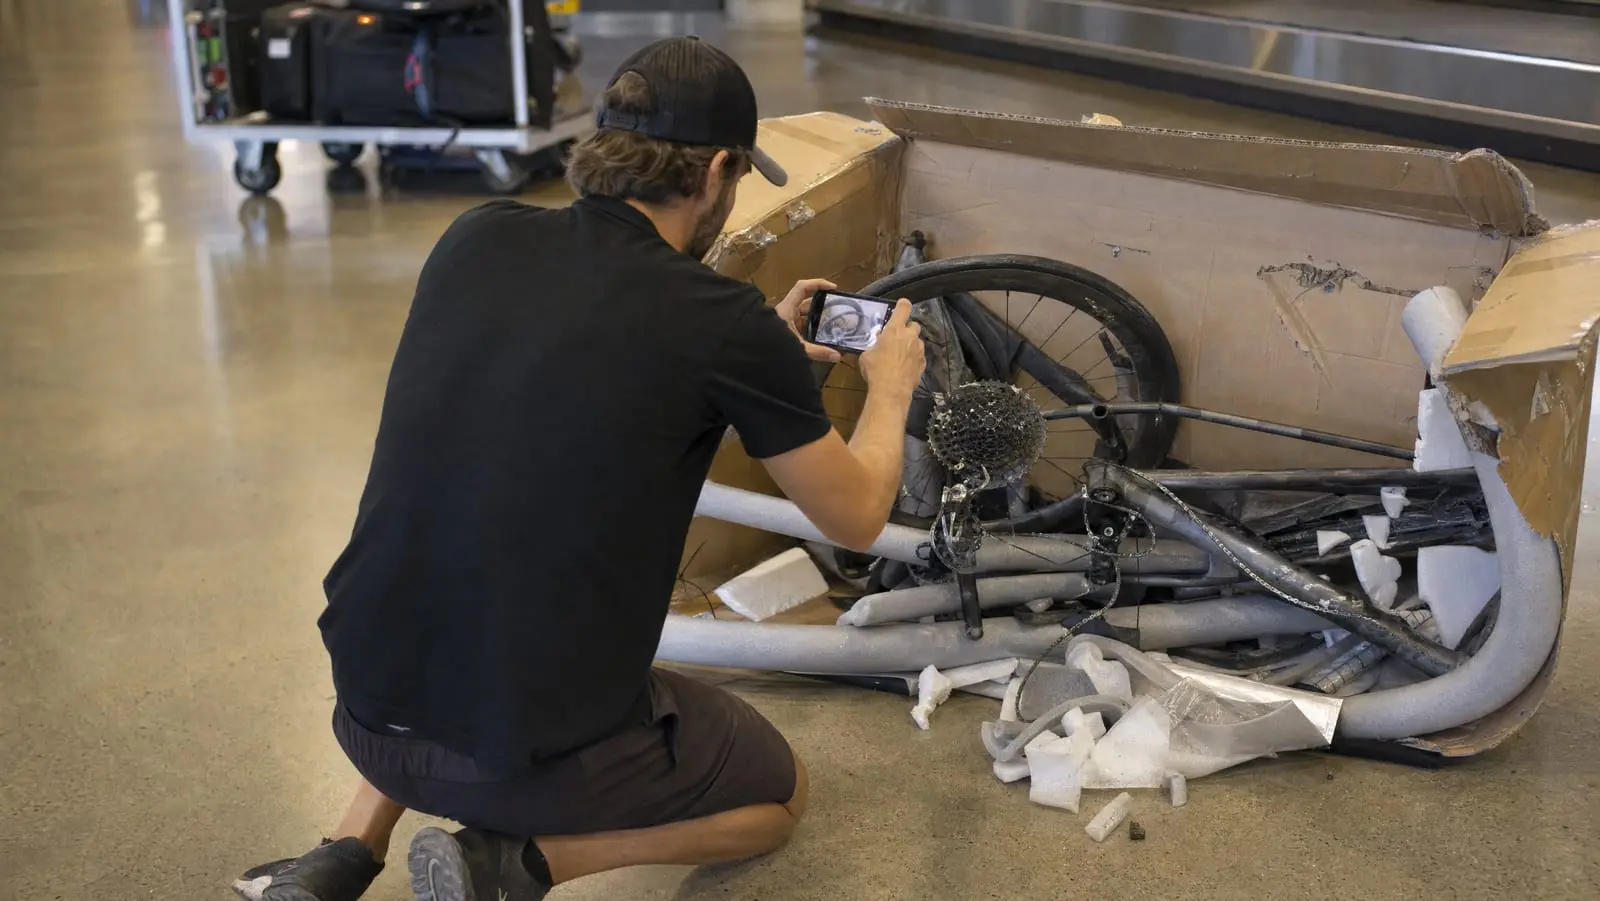
At home, a slightly-off bolt gets caught: you ride Tuesday, hear a creak, fix it Wednesday. On a trip you set a stem faceplate in a parking lot and immediately ride 60 loaded miles down a gravel descent. No shakedown lap, no shop.
Park Tool names both failure modes in its guide to torque specifications and concepts: "too much tightening will deform the threads or the parts," while "too little preload will mean the fastener will loosen with use." A rushed airport build exposes you to both at once. Carbon raises the stakes, because it cracks rather than stretching — Park Tool notes that "seat posts require only minimal tightening to not slip downward."
Use the number printed on the part, or the one its maker publishes. Values are component- and frame-specific, and Park Tool says its own figures are "for reference only" and that you should "contact the manufacturer for the most up to date specifications." Photograph your stem and seat clamp markings before you pack.
Tool 1: A Torque Wrench You Will Actually Pack
The decision here is range versus volume. A full kit covers every fastener from a 2 Nm accessory bolt to a rotor or lockring. A dial tool covers 4, 5 and 6 Nm — where the stem, seatpost and lever clamps live, and where the expensive mistakes happen.
LEXIVON Bike Torque Wrench 1/4-Inch Drive 15-Piece Kit (LX-191)
LEXIVON Bike Torque Wrench 1/4-Inch Drive 15-Piece Kit (LX-191)
A 15-piece kit spanning 2 to 26 Nm with micro-adjustments to 0.2 Nm, which reaches from a carbon stem faceplate at one end to a rotor or lockring at the other. LEXIVON lists eight hex bits from H2 to H10, four Torx from T10 to T30, and a stated accuracy of plus or minus 4 percent clockwise. The tradeoff is bulk: a tray of bits, not a pocket tool.
- 2-26 Nm with 0.2 Nm micro-adjustment
- Hex H2 to H10 plus Torx T10 to T30
- 72-tooth ratchet with quick-release
- Ships pre-calibrated, serial-numbered
- Chrome-molybdenum steel
Price may vary
We would buy this if you travel with a hard case, or if there is any chance you will touch a rotor, crank bolt or cassette at destination torque. At $59.97 as of August 2026 the money is not the issue — case volume is. In a box already at the airline's linear-inch limit, a bit tray is real estate you may not have.
MARQUE Adjustable Bike Torque Wrench (4, 5, 6 Nm)
MARQUE Adjustable Bike Torque Wrench (4, 5, 6 Nm)
A dial tool that does three settings and nothing else: 4, 5 or 6 Nm. MARQUE says the mechanism clicks out once torque exceeds the setting, which is the behaviour that saves a carbon bar or seatpost from a rushed hand. MARQUE also states it cannot recommend the correct setting for your parts, because each component maker publishes its own.
- Dial-adjustable to 4, 5 or 6 Nm
- 3, 4 and 5 mm hex plus T25 Torx
- Bits store inside the tool
- Click-out release at the set torque
- Individually tested with a serial number
Price may vary
For most riders flying with a soft case or a cardboard box, this is the one we would pack. At $38.99 as of August 2026 it covers nearly every reassembly bolt on a modern gravel bike in a fraction of the volume. The limitation is real: nothing above 6 Nm, so it is a companion to the pedal wrench, not a replacement. Own one bike and one case? Buy the LEXIVON instead and stop thinking about it.
Tool 2: A Pedal Wrench With Real Leverage
Pedals are where a multi-tool genuinely lets you down. Shimano's pedal dealer manual specifies an installation torque of 35 to 55 Nm — five to ten times what a stem faceplate wants. You cannot generate that on a four-inch multi-tool arm, and trying is how a hex socket rounds out.
Park Tool's pedal installation and removal guide is worth re-reading before a trip: the left pedal has a left-hand thread, so it removes clockwise and installs counterclockwise, and Park Tool's instruction is to "heavily grease threads of both pedals." Grease is also why the pedals come out again for the flight home.
groword 4-in-1 Bike Pedal Wrench (320 mm)
groword 4-in-1 Bike Pedal Wrench (320 mm)
A 320 mm steel wrench with two 15 mm openings and one 9/16-inch opening, plus 6, 8 and 10 mm hex sockets, so it covers both wrench-flat and hex-socket pedals in one tool. groword lists 5 mm thick laser-cut, quench heat-treated steel with a PVC-coated grip. The handle length is the entire point.
- 320 mm handle for real leverage
- Two 15 mm plus one 9/16-inch opening
- 6, 8 and 10 mm hex sockets
- 5 mm thick laser-cut steel
- PVC-coated non-slip grip
Price may vary
At $14.99 as of August 2026 this is the cheapest tool here and the one we would refuse to travel without. The catch is that 320 mm is roughly 12.6 inches of dense steel in a case already fighting a weight limit. If your pedals take an 8 mm hex only, a long-handled hex key is lighter.
Tool 3: A Derailleur Hanger Alignment Gauge
This is the tool that makes a travel kit a travel kit. Park Tool explains in its rear derailleur hanger alignment guide that the hanger is designed to bend, so that in an impact — "a crash, a fall, or rough handling around a rack or other obstacle" — it takes the damage instead of the derailleur and frame. Baggage handling is exactly that, applied to a bike you cannot watch.
A bent hanger is also the one flight injury you cannot bodge. A hanger a couple of millimetres out will ghost-shift all week and, at worst, put the derailleur into the spokes. Park Tool's tolerance is tight — measure against the rim at several points, and the hanger is aligned horizontally only if the indicator sits less than 3 mm from the rim. No amount of cable tension fixes bent metal, though our derailleur adjustment and repair guide covers what tension can do.
Park Tool DAG-2.2 Derailleur Hanger Alignment Gauge
Park Tool DAG-2.2 Derailleur Hanger Alignment Gauge
The shop standard. It threads into the hanger in place of the derailleur and extends the hanger plane out to the rim, magnifying misalignment you cannot see by eye. Park Tool cites improved clearance and reach for more frame and hanger combinations, including low-clearance thru-axle hangers, tighter tolerances than the previous version, and a replaceable 10 mm x 1 threaded tip.
- Clears low-clearance thru-axle hangers
- Tighter tolerances than the previous version
- Fits 20-inch to 29-inch-plus wheels
- Replaceable 10 mm x 1 threaded tip
- Large inner shaft for added strength
Price may vary
We would spend the $93.95 as of August 2026 if you fly with a bike more than twice a year or ride somewhere without a shop. It is also the heavy one: Park Tool lists it at 937 grams and 405 mm long, an awkward shape to bury in foam.
FAITIO Bike Derailleur Hanger Alignment Gauge
FAITIO Bike Derailleur Hanger Alignment Gauge
The budget route to the same measurement. FAITIO claims 0.4 mm alignment accuracy and a calibrated lever intended to apply gradual force rather than a sudden bend, which is the failure mode that snaps a hanger instead of straightening it. Stainless steel, fitting 20-inch to 29-inch wheels. Treat the accuracy figure as a manufacturer claim.
- Manufacturer claims 0.4 mm accuracy
- Fits 20-inch to 29-inch wheels
- Calibrated lever applies gradual force
- Stainless steel construction
- Light enough for a travel kit
Price may vary
At $29.99 as of August 2026 this is what we would pack for a one-off trip, for an unsentimental reason: a gauge that is in the case beats a better gauge that stayed home. You give up the reach and tolerance that justify the Park Tool on awkward frames.
Tool 4: A Pump With a Gauge
Tires get deflated for the flight, and you cannot judge pressure by thumb on a 45 mm tire under a loaded bike. SILCA's write-up on its tire pressure calculator puts numbers on the asymmetry: being 10 psi too high cost 9 watts in their testing, while being 10 psi below the breakpoint cost 1 watt. The same piece puts pump gauges under the same scrutiny: SILCA says most pumps are accurate to about 5 or 6 percent when new, and that it has seen new pumps off by as much as 7 to 8 psi.
Tiakia Mini Bike Floor Pump with Gauge
Tiakia Mini Bike Floor Pump with Gauge
A folding mini floor pump about 7.1 inches tall and roughly 180 grams, with a mechanical gauge reading 0 to 140 PSI. The T-shaped dual head takes Presta, Schrader and Dunlop without swapping adapters. Tiakia rates maximum inflation at 220 PSI with a single intake up to 80 cc, so expect a lot of strokes to fill a big gravel tire.
- About 7.1 inches tall, roughly 180 grams
- 0-140 PSI mechanical gauge
- Presta, Schrader and Dunlop head
- Foldable foot pedals, 12.9-inch hose
- CNC aluminum body with storage bag
Price may vary
At $25.64 as of August 2026 this is the compromise we would make: a real gauge in a package that fits beside the frame. It is not a floor pump, and seating a stubborn tubeless bead with it is optimistic — our comparison of mini pumps versus CO2 covers what each can do.
Tool 5: The Consumables Nobody Packs Until They Have To
Tools get the attention; consumables save the trip. This is the cheapest part of the kit and the part most often missing from it.
- Two spare hangers for your exact frame. Hangers are not universal, and no small-town shop stocks yours.
- Spare bolts for the stem faceplate, seat clamp, cages and rack mounts. They vanish into gravel and hotel carpet.
- A quick link in your chain's speed, plus a short length of chain if you split it to pack.
- Zip ties and electrical tape for housing, a rattling rack, a temporary fender fix.
- Spare axle end caps or spacers if your hubs use them. They fall out in transit and are hub-specific.
- A rag and nitrile gloves. You will handle a chain, then your bars, then a sandwich.
Which Tools Go in Which Bag
Most of this kit is checked baggage. The TSA's guidance on tools allows hand tools 7 inches or shorter in carry-on and sends anything longer to checked baggage, with the final call resting with the officer. The 320 mm pedal wrench is about 12.6 inches and the Park Tool gauge is 405 mm, so both are checked-only.
CO2 catches people out. The TSA lists CO2 cartridges as prohibited in carry-on and checked bags unless it is clearly visible that the cylinder is empty, so buy inflators at your destination. Our guide to flying with bikepacking gear covers the rest of the sharps, fuels and batteries.
The Reassembly Sequence, In Order
Order matters, because each step makes the next easier and the last one catches the mistakes in all of them. In our experience the sequence that works is:
- Unpack onto a clean surface and count the small bags before the foam goes in the bin. Inspect frame and fork while you can still photograph damage beside the case.
- Fit fork, headset and bars, then stem and faceplate. Snug the faceplate bolts in a cross pattern, in stages, to the number printed on the stem.
- Install the seatpost to the height mark you photographed, greased or pasted as it requires, clamped only enough not to slip.
- Fit the wheels, then the rear derailleur if it came off. Check the axles seat fully.
- Check hanger alignment with the gauge before touching the shifting. Everything downstream is wasted if the hanger is bent.
- Install the pedals. Grease both threads, remember the left is reverse threaded, use the long wrench.
- Reconnect and test the brakes. Pull the levers repeatedly before you trust them.
- Inflate to your target pressure with the gauge, not by feel.
- Run the shifting through the whole cassette, both directions, bike lifted.
- Ride ten minutes, then re-check every bolt you touched.
That last step is our pre-trip bike inspection checklist run in a parking lot instead of a garage. Budget 30 to 45 minutes, longer the first time.
What to Leave at Home, and the Weight Arithmetic
Every pound of tools is a pound off your checked allowance. Delta's sporting equipment policy pushes bikes over 50 lbs into excess weight fees, caps the case at 115 linear inches, refuses anything at 100 lbs or more, and requires "a durable protective container designed specifically for bicycles." Carriers vary in the details — we break those down in airline bike fees and policies — but 50 pounds is the line most of them draw.
A hard case can weigh close to 40 pounds before the bike goes in — Thule lists the RoundTrip Transition at 39 lbs empty — which is why case choice and tool choice are one decision; see our roundup of the best bike travel cases and bags. The Park Tool gauge alone is 937 grams of that budget.
Leave at home: chain whip and lockring tool, bottom bracket tools, open-end wrench sets, a truing stand, spare tires, and a second multi-tool. If a job needs those, it needs a shop.
If You Can Only Take Three Tools
Some trips leave no room — a soft case at the limit, a shared box, a small car. Three tools, in this order:
- The pedal wrench. Pedals must come off to pack and go back on to ride, and nothing else does it.
- The torque wrench, dial version if space is tight. The difference between assembled and assembled correctly.
- The hanger gauge, budget version. The only fix for the most likely flight damage.
The pump goes first. Gas stations, hotels and other cyclists can usually produce one, and a borrowed pump with a gauge is as good as yours.
The Bottom Line
Build the travel kit once, keep it in the case, and never raid it for a weekend ride. Five tools, a bag of consumables and a photo of your torque markings will get a boxed bike rolling in well under an hour.
Buy in this order: the pedal wrench first, at $14.99 as of August 2026 and irreplaceable; then the torque tool that matches your case volume; then a hanger gauge sized to how often you fly. For cases, airline rules and packing method, start with our full guide to getting your bike to the start line.