How to Pack a Bike for Flying: A Step-by-Step Guide
20+ years testing gear in Colorado backcountry
How to Pack a Bike in a Bike Box, Step by Step
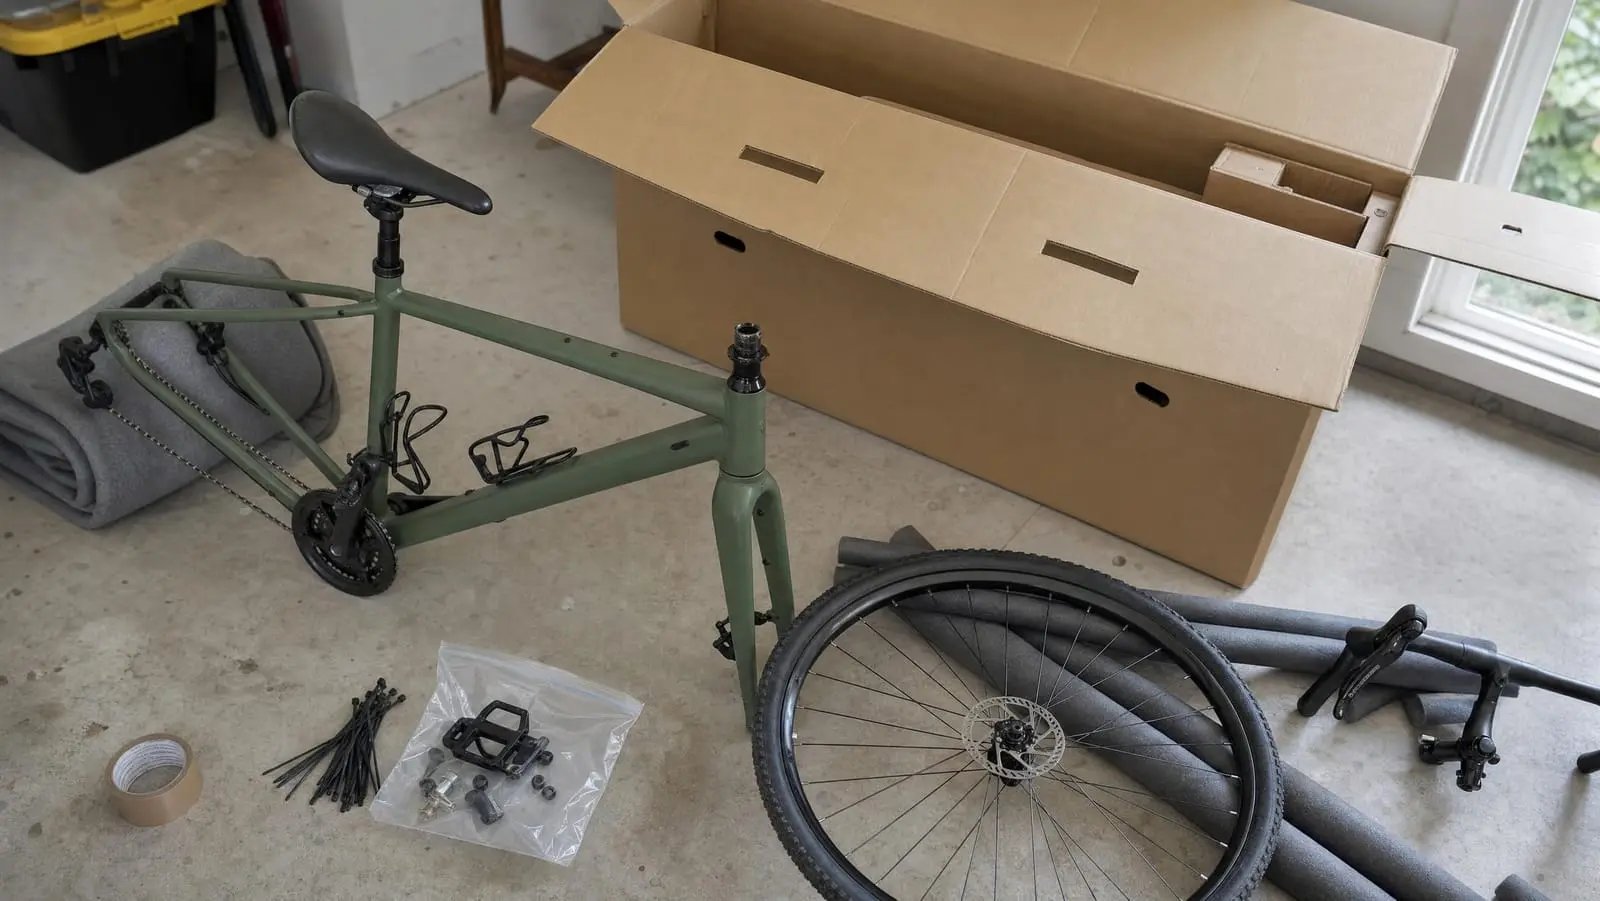
To pack a bike in a bike box, strip it to a frame and fork, protect the five parts that actually break, and weigh the box before you tape it shut. The order: photograph the built bike, pull the rear derailleur, then the pedals, wheels, rotors, seatpost and handlebars, pad every hard contact point, and check weight and linear inches last. Budget 90 minutes the first time and about 40 once you have done it twice.
The sequence matters more than the materials. A cardboard box with disciplined padding survives a connection through Dallas better than a hard case that someone filled in a hurry, because almost every flight injury we have seen or read about comes from one part levering against another inside the box, not from the box itself failing.
This article covers the packing step only. For fees, case shopping, shipping alternatives and the rebuild at the other end, start with our full guide to how to travel with a bike.
What You Need Before You Start
A box or a case
Your three options are a cardboard bike box from a local shop, a soft travel bag, or a hard case, and they differ mostly in how much protection you buy per pound of dead weight. We compare the specific models in best bike travel cases and bags; the packing method below is the same for all three.
Sizes are closer than people expect. The Bikeflights Bike Box Large is listed at 64 by 14 by 32 inches assembled, which works out to 110 linear inches. OutdoorGearLab lists the EVOC Travel Bag Pro at 54 by 17 by 30 inches, or 101 linear inches, and weighed it at 21 pounds 11 ounces empty with its packing materials inside. Both clear the common airline ceiling, but neither clears it by much, and the soft bag has already eaten 21 pounds of your weight allowance before the bike goes in.
If the whole job sounds like more than you want to take on the night before a flight, a shop will do it. Bikeflights says shop packing "typically ranges from $75 to $125 for most shops in the US" (bikeflights.com). The tradeoff is that you still have to pack it yourself for the flight home, in a hotel room, with whatever tools you brought.
Padding and consumables
Pipe insulation for the tubes, bubble wrap or foam for components, flat cardboard for dividers, zip ties, packing tape, and a few zip-top bags for hardware. Buy double. Everything you cut and tape here has to be reproduced at the other end, and the hardware store nearest your hotel may not stock foam.
Tools
Park Tool's packing walkthrough lists the short version: a pedal wrench, hex wrenches, padding, tape, zip ties and parts bags (parktool.com). Add a torque wrench if your bike has carbon parts. What travels with you and what stays home is its own decision, and we work through it in the bike travel tool kit.
Your phone
The camera is a packing tool. It is your rebuild reference, and if the bike comes off the belt damaged, the photos are the difference between a claim and an argument.
Disassemble a Bike for Travel: the Order That Works
1. Photograph, then touch nothing
Shoot both sides of the built bike, then close-ups of the seatpost at its mark, the spacer stack under the stem, the brake lever angle on the bar, and the saddle fore-aft position. Thirty seconds now saves twenty minutes of fiddling in a hotel parking lot.
2. The rear derailleur comes off first
Shift into the smallest cog first — that is where SRAM's travel instructions for its Full Mount derailleurs start — then unbolt the derailleur from the hanger, leave the cable or wire attached, wrap it, and zip-tie it to the chainstay. Park Tool's guide gives the same instruction: remove the rear derailleur, wrap it in padding, zip-tie it to the frame.
The reason is leverage. As Quintana Roo's mechanics put it, "the derailleur acts like a big lever, and if weight gets put on it inside your bike bag or box, your hanger will bend" (quintanarootri.com). Bikeflights makes the same point about half measures: "Don't be fooled into thinking that just shifting it inboard will protect it" (blog.bikeflights.com). A bent hanger is usually straightenable, but you will not discover it until your first climb.
3. Pedals, wheels, rotors, axles
Pedals next, because a pedal sticking out of a packed box is a puncture waiting to happen. The left pedal unthreads clockwise. Park Tool suggests greasing the threads before you bag them, which is free insurance against a seized pedal next season.
Then the wheels. Park Tool also recommends removing disc rotors from the wheels, wrapping them, and storing them with the parts bag, and reinstalling thru axles into the fork and frame so they do not get lost. A rotor left on a wheel that gets leaned on comes out shaped like a potato chip, and a bent rotor is a rub you cannot dial out at the trailhead.
4. Seatpost and handlebars
Wrap tape around the seatpost at the frame's edge before you pull it, then remove and pad it. Handlebars can usually stay on the stem if you rotate them 90 degrees, which is what Park Tool advises. If they have to come off, tape-mark the rotation first and leave the cables and hoses connected. Disconnecting hydraulic hoses to save two inches of box means bleeding brakes on arrival.
5. Tires and sealant
Let some air out, but do not evacuate the tires. Park Tool is blunt about the physics: unless it is a high-pressure road tire, "it is not necessary to deflate for air travel," because the additional pressure from air travel is less than 14 psi. The practical reasons to drop pressure anyway are that plenty of airline and case-maker instructions still ask for it, and a softer tire packs flatter and absorbs impact better.
Do not drop a tubeless tire below the point where the bead unseats. If yours is due for fresh sealant, we would top it up after landing rather than before the flight, so there is less liquid sloshing around a tire that is going to spend hours on its side. Spare sealant can ride in a checked bag — the 3.4-ounce limit is a carry-on rule, and TSA's own instruction is to "pack items that are in containers larger than 3.4 ounces or 100 milliliters in checked baggage" (tsa.gov) — but bag it twice.
Protecting a Bike Frame in Transit: Where Damage Actually Happens
Padding everything equally is a waste of foam. Five places take nearly all the abuse.
The rear derailleur and hanger. Already handled above, and worth the five minutes.
The fork and rear dropouts. An empty fork is a spring with nothing between the legs. A stack of bags on top of the box squeezes it, and the legs stay squeezed. Park Tool's fix is a fork block in the fork legs plus a rear block if the rear wheel came out; a length of dowel or the old thru axle does the same job.
Thin tubes and stays. Seatstays, chainstays and the down tube take hits from whatever moves inside the box. Pad every place where two hard things touch, then separate the wheels from the frame with rigid cardboard so the cassette and rotors cannot chew the paint.
Disc brake calipers. With the wheels out, the pistons have nothing to stop them. SRAM explains it directly: "If you pull your brake lever when the wheel is removed from the bike, the brake caliper pistons will adjust to a narrower position that doesn't include the width of the rotor," and recommends installing a pad spreader in the caliper "while traveling with your wheel removed to prevent the pistons from advancing if the lever is accidentally activated" (sram.com).
Anything that protrudes. Bottle cages, top-tube bag mounts, a dropper remote hanging off the bar. If it sticks out and can catch, it will catch.
Nothing in a bike box breaks on its own. Things break because something else levered against them.
What to Do With Bikepacking Bags When You Fly
This is the part generic packing guides skip. You are not flying with a bike; you are flying with a bike, four soft bags, a sleep system and a stove.
In the box: empty bikepacking bags, straps and harnesses. They are soft, light, and they double as padding around the frame. Keep hard objects out. Delta states plainly that it "is not responsible for damage noted at the time of check in or damage due to over packing the bag" (delta.com), and a pot set pressed against a carbon down tube is exactly the claim an airline will decline.
In a separate checked bag: sleeping bag, pad, tent, clothing, shoes, and your stove — as long as it is genuinely clean. The FAA forbids all camp stove fuels in both carry-on and checked baggage, "including containers and equipment with residual fuel" (faa.gov). A stove purged of fuel, vapors and other hazardous materials is allowed, but the FAA also warns that "some airlines may not accept used camping equipment that has had fuel in it regardless of how well it has been purged" (faa.gov). Buy fuel at the destination and plan the first night around a resupply stop.
In your carry-on: spare batteries and small tools. Spare lithium-ion batteries and power banks must travel in the cabin, not in checked baggage (faa.gov). Screwdrivers and wrenches 7 inches or shorter are allowed in carry-on bags, measured end to end when assembled, with longer tools relegated to checked baggage (tsa.gov) — so a multi-tool rides with you and a pedal wrench does not.
Nowhere: CO2 cartridges. The TSA's entry for them reads "No" for both carry-on and checked bags: apart from personal medical oxygen, "you can only carry an EMPTY compressed gas cylinder onboard a plane," and it has to be clearly visible to the officer that it is empty (tsa.gov). The one narrow exception is cartridges inside a life vest, which TSA handles under a separate entry and does not extend to loose inflator cartridges. Pack a mini pump instead; we compare the options in mini pumps vs CO2.
The full security-side rundown, including electronics, bear spray and the questions agents actually ask, is in flying with bikepacking gear.
Weight and Dimensions Before You Close the Lid
Two numbers decide whether you pay the fare you expected. Delta requires bikes to be "packed in a durable protective container designed specifically for bicycles," charges an excess weight fee above 50 pounds, and will not accept a bike that exceeds 115 linear inches or weighs 100 pounds or more (delta.com). American's published requirements are similar: the bike has to be "in a hard-sided case, bicycle bag or box built for bicycle transport," handlebars "fixed sideways," and pedals removed — or pedals and handlebars "wrapped in plastic foam or a similar material" — with standard checked-bag fees applying up to 50 pounds and sports equipment capped at 115 linear inches (aa.com). Current fees by airline live in our airline bike fees and policies roundup.
Now do the arithmetic. A soft bag measured at 21 pounds 11 ounces empty leaves roughly 28 pounds for the bike and everything else — comfortable for a 22-pound gravel bike, tight for a loaded touring rig with a dynamo wheelset. Weigh the closed box on a bathroom scale by holding it and subtracting yourself, and measure the outside of the box including feet and wheels, because that is what the agent's tape measures.
If you are 3 pounds over, the fastest fix is to move tools and shoes into your carry-on, not to repack the bike. If you are over on dimensions, you have the wrong box, and there is nothing to do at the airport about it.
At the Airport: Inspection, Tape and the Oversize Belt
Assume your box will be opened. TSA screens all checked baggage, and if an officer has to open yours, a "Notice of Baggage Inspection" goes inside the bag. TSA also points travelers to recognized locks, which officers can open with universal master keys "so that the locks may not have to be cut" — the packaging tells you whether a lock qualifies (tsa.gov). A cardboard box gets its tape sliced and re-taped by hand, and nobody re-tapes it as well as you did.
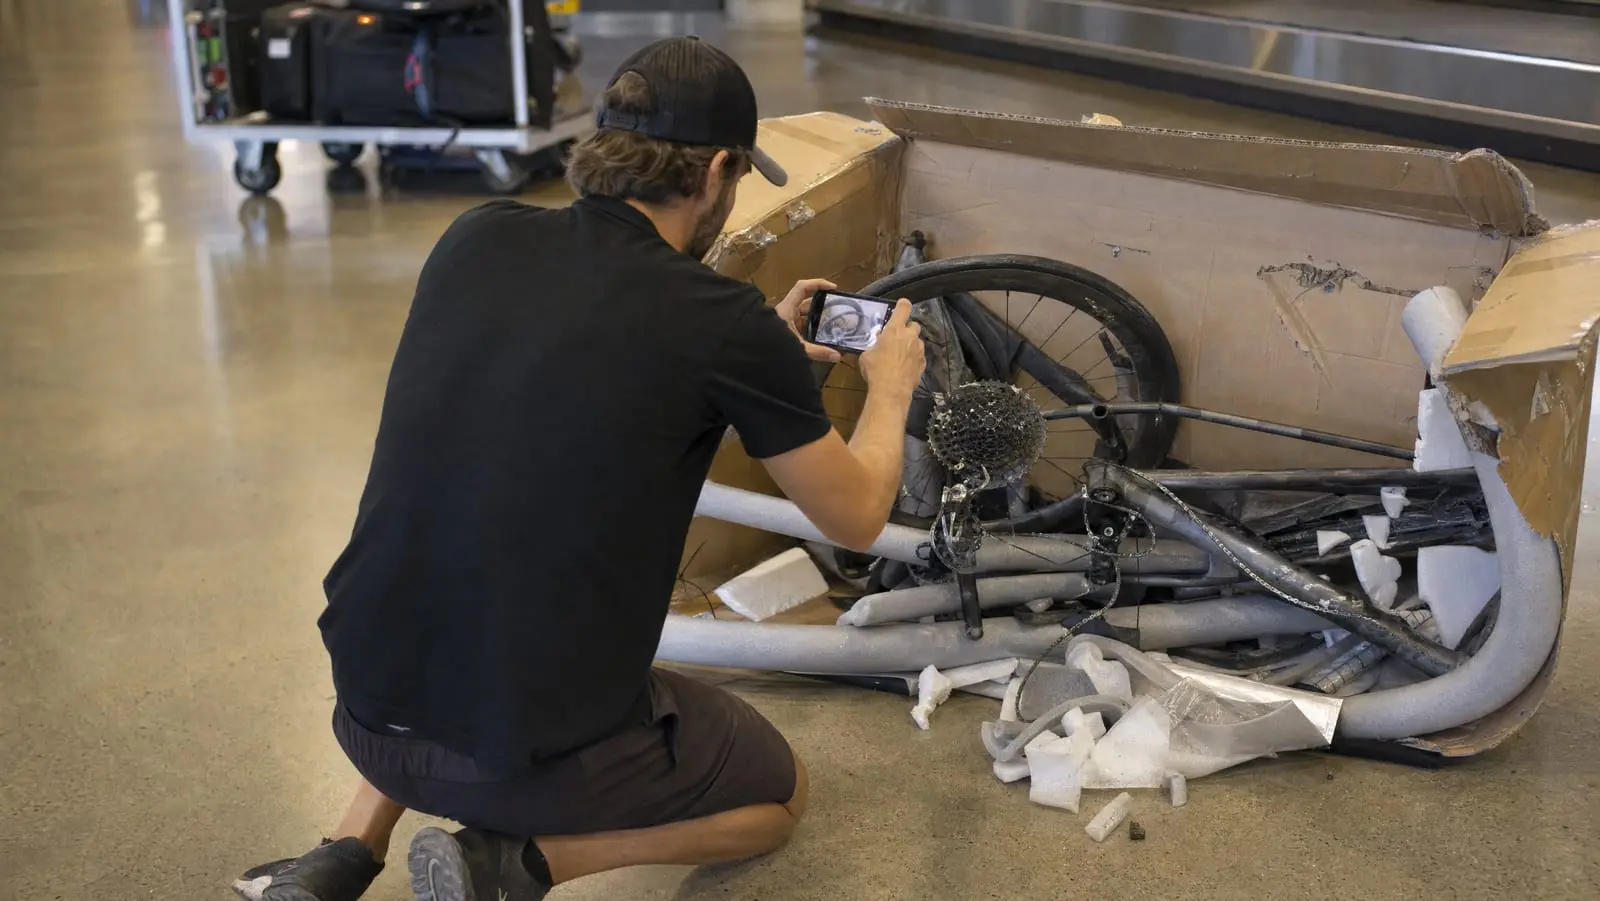
So carry a roll of packing tape and four zip ties in your carry-on, and give yourself an extra 20 minutes at check-in. Bikes usually go to an oversize baggage belt rather than the main carousel, so look for the oversize claim area on arrival — and if the box comes off the belt damaged, report it at the airline's baggage service office before you leave the airport, not after.
Photograph the closed, taped box at the counter. If it arrives crushed, that photo establishes what it looked like when you handed it over.
Rebuild It the Same Way You Packed It
Packing a bike for air travel is a checklist, not a craft. Photograph, strip in order, fill every space that can collapse, pad every place two hard things meet, and weigh the box before the tape goes on.
Then reverse it deliberately at the other end. Torque the seatpost and stem to spec rather than by feel, reinstall the derailleur before the wheel, and run through our pre-trip bike inspection checklist before you ride away from the hotel — a box arriving intact is not the same as a bike arriving in tune.
For the rest of the logistics, from what carriers charge to what happens when a case shows up damaged, our complete guide to traveling with your bike by air covers the whole trip.