Bike Rack Weight Limits, Bolts and Torque: What Actually Fails
20+ years testing gear in Colorado backcountry
The Short Answer: Four Limits, and the Rack Is Rarely the One That Binds
A bike rack weight limit for bikepacking is not one number but four: the rack's published rating, the frame or fork's rated mount capacity, the clamping limit of the bolts joining the two, and the dynamic load that rough ground multiplies out of whatever you weighed at home. The lowest of the four governs, and it is almost never the rack.
The limit that binds is usually the frame's or the fork's, and the part that breaks is usually an M5 bolt nobody re-torqued. That is the uncomfortable thing about rack-based carry systems: the two numbers that decide your setup are the two nobody looks up, and the failure they produce is not a gentle sag but a loose strut finding a spinning wheel.
What a Rated Capacity Actually Means
Two standards get named here. According to Wikipedia's entry on luggage carriers, the European one is EN 14872, "Bicycles – Accessories for bicycles – Luggage carriers," and the international one is ISO 11243, "Cycles – Luggage carriers for bicycles – Concepts, classification and testing." National standards catalogues record EN 14872:2006 as withdrawn and superseded by EN ISO 11243:2016, which ISO has itself since replaced with ISO 11243:2023, "Cycles — Luggage carriers for bicycles — Requirements and test methods." The Wikipedia entry puts typical rear carriers at a 25 kg (55 lb) maximum with some rated to 40 kg (90 lb), gives a typical front-carrier design load of around 2 x 10 kg, and states that "most luggage carriers are not designed to withstand the weight of an adult person."
What matters more is the testing. Hegewald & Peschke, who build test rigs for DIN EN ISO 11243, describe a vertical dynamic test in which the loaded carrier is "set into a vertical, sinusoidal vibration" at 7 Hz, stopping automatically "after reaching 100,000 cycles," plus a lateral test that swings the rack at 1 Hz through plus or minus 5 to 7.5 degrees for another 100,000 cycles. A standard-backed rating is a vibration-survival claim, not a shelf rating.
You can watch a maker reason about the standard in public. Rose Bikes' listing for the Tubus Airy — titanium, a stated 281 g — gives a max load of 26 kg and explains that Tubus stops there deliberately, because racks rated 27 kg or more are approved for child seats under ISO 11243:2016, and the Airy is not. That is a number with reasoning attached. A listing that states a capacity and names no standard, test or exclusion gives you a figure without telling you how it was earned, and when we line up published ratings in the best rear racks for bikepacking, that reasoning is most of what separates the racks we would load from the ones we would not.
The Four Limits, in Order, and Where to Find Each One
1. The rack's rating
Read it as conditional. Bikepacking.com reports the Old Man Mountain Divide at "55lbs (eyelet mounted) / 70lbs (axle mounted)" — one 970 g rack, two ratings 15 lb apart, mounting method the only variable. When a single rack carries two capacities, the rack was never the limit. The mount was.
2. The frame or fork's mount rating
This is the number that usually binds, and it lives in the bike maker's documentation, not the rack's box. Ribble's own help-centre article on fitting a rear rack says "alloy, steel, and titanium models with mounts can usually take up to 25kg" — note which material is missing from that sentence. Look in the owner's manual or the model's support page, or ask the brand. If nobody publishes a figure, treat the silence as the answer and stay well under the rack's number.
Bolt a rack to a bike that shipped without eyelets and the adapter's rating becomes a third link in the chain; mounting a rack without eyelets covers which kits suit which axle standards.
Three-pack and cargo-cage mounts belong here too, and their numbers are small. Bikepacking.com's review of the Salsa Anything Cage HD lists a "Cargo Weight Limit: 3kg/6.6lb," bolted to Salsa's three-hole bosses with hex bolts, washers and Loctite. A three-pack mount is a single-digit-kilo fitting, not a second rack. And that 3 kg is the cage's limit; the fork's own figure for those bosses may be lower, and is published far less often.
3. The bolt and the thread it enters
The steel bolt is rarely the weak element. The female thread is: an aluminium eyelet, a brazed boss, or an insert bonded into carbon. You cannot over-tighten your way to capacity, and the attempt is how eyelets die.
4. The dynamic load
Do the arithmetic on that lab test: 100,000 cycles at 7 Hz is under four hours of continuous shaking, and one long gravel day is a longer, messier, less predictable input than any rig applies. We have found no credible published multiplier for bikepacking loads on rough ground, and we will not invent one. The rating is a ceiling you ride below, not a budget you spend to the last kilo, and the margin you leave is the only part of this you control.
Bolts and Torque, Practically
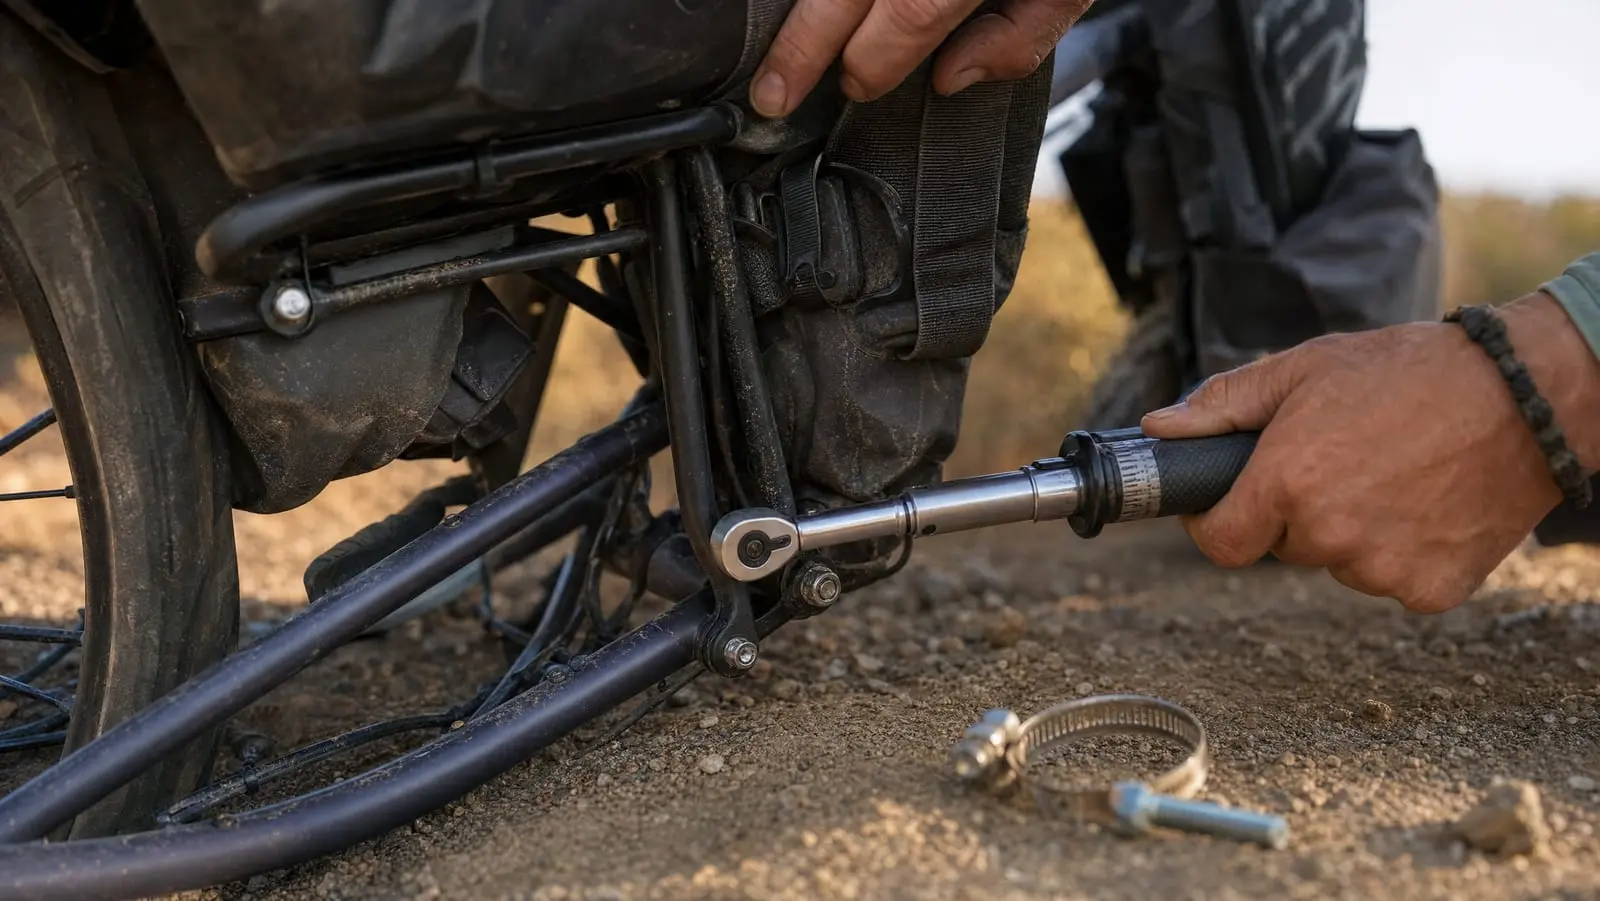
M5 is the bolt you will meet most at rack eyelets. Here are three published figures for it, from three makers' own documents:
- Old Man Mountain's eyelet kit instructions specify "M5 bolts (Eyelets) = 3 Nm" and "M6 bolts (Dropouts and Extenders) = 6 Nm," and list hex keys "on a torque wrench" among the tools needed.
- Ribble's rack-fitting guidance says to "tighten bolts securely to 2–4Nm," with thread lock applied.
- The Blackburn EX-1 Top Deck manual states "Recommended Torque: 5.5-6.5Nm."
That is 2 Nm to 6.5 Nm for nominally the same size of fastener. There is no generic rack bolt torque: check your rack's own documentation first, and where the rack's figure and the frame's figure disagree, use the lower of the two.
Why a wrench matters more on aluminium and carbon than on steel comes down to what is at risk. Park Tool's explanation of torque holds in both directions: "too little preload will mean the fastener will loosen with use," and "too much tightening will deform the threads or the parts." A steel frame with a brazed-on boss survives guesswork more often. In an aluminium dropout or a bonded carbon insert, the thread that strips belongs to the frame.
Thread locker is the cheap half of the answer — Ribble recommends it, and Salsa's three-pack install uses Loctite per that bikepacking.com review. We would choose a medium-strength threadlocker over a stack of lock washers, because every extra interface under a bolt head is another surface that can settle and hand you slack.
Stainless hardware in aluminium has its own failure mode. Fabory's technical note on seizing defines galling as "the surface damage and material transfer caused by friction and adhesion between sliding metal surfaces," with cold welding as the solid-state bond that follows, and flags austenitic A2 and A4 stainless, the common bicycle-bolt grades, as particularly prone. Its prevention list is unglamorous: anti-seize or high-pressure lubricant, threads "clean and free from burrs, metal particles, chips, sand and dust," and "a slow, smooth and even rotation speed" instead of impact driving. Thread prep also changes how much torque becomes clamping force, so follow one maker's figure with that maker's prep.
What Actually Fails, and Roughly in What Order
The loose bolt, first and most often
It does not stay small. In October 2019, per BikeRadar's report, Surly told riders to remove its 8-Pack and 24-Pack front racks immediately after reports of "a small number of Surly 8-Pack and 24-Pack Racks loosening, contacting the front wheel and causing accidents," and said it was working with the US Consumer Product Safety Commission towards a resolution. Surly's own December 2019 update describes that resolution as "new Security Hardware that includes patched bolts to attach the rack to your fork," plus hardware at the end of each upper strut. The fix for a rack that failed was better bolts, not a bigger rack.
The cracked stay at a weld
Welds are stress concentrations and vibration finds them. Bikepacking.com notes that the original aluminium Anything Cage "was prone to breaking around the welds at the three individual mounting plates," and that the HD is instead injection-moulded nylon — which reads as a maker changing material because the joint, not the capacity, was the problem.
The sheared eyelet and the pulled insert
Both usually have an over-torque or a long spell of under-torque in their history. A bolt cycling loose and tight for a week works the thread; a bolt hauled past the frame's figure on day one damages it at once. Either way the frame is now the broken part, and Blackburn's manual carries the line that covers most of this: "Periodically check all nuts and bolts for tightness."
The fatigue crack at the platform
The slowest failure and the one you can catch: a hairline at a tube junction or under the deck, usually on the side you load heavier.
A rating tells you what the rack survived in a laboratory. A torque wrench tells you whether your bike is included in that claim.
The Pre-Trip Check and the One at Day's End
Before you leave, torque every rack fastener to its published figure with a wrench, not by feel: rack-to-eyelet, strut-to-rack, strut-to-frame, and any adapter hardware between. Old Man Mountain ends its instructions with the right emphasis — "double check all hardware and parts before each ride!"
At day's end, do the thirty-second version by hand: grab the rack at the deck and push it side to side, then fore and aft. A rack that moves relative to the frame has a loose bolt, and finding it in camp costs nothing. Riders on bikepacking and touring forums regularly report rack bolts working loose or disappearing on rough, washboarded gravel, and advise re-tightening on the trail rather than trusting the torque from the build. Make every resupply a bolt check.
Loading to Stay Inside the Limits
Heavy items go low and close to the axle — ideally forward of it, on the deck nearest the seat tube rather than hanging off the tail. A tent strapped to the back edge of the platform is a lever on every weld, and the load that makes the front wheel feel vague.
Rear-heavy is the default mistake, because the rear rack is the easy place to put things. A bike with too much mass behind the saddle wanders at speed and goes light at the front on climbs, a handling problem before it is a hardware one. Riders commonly describe the touring convention as carrying more of the load forward than feels natural, and the mechanics are worked through in our guide to weight distribution when packing. Remember that the front is the lower-rated end: Wikipedia's luggage carrier entry puts typical front-carrier design loads near 2 x 10 kg — 20 kg in total, below the 25 kg that same entry gives as typical at the rear — which is why front racks and low-riders get their own capacity conversation.
Two details decide whether the load stays put. Rack tube diameter is the first: pannier hooks are sized for a range, and a hook loose on a thin tube rattles itself off. Whether those hooks lock or merely rest is the second — the distinction we keep returning to in the best panniers for bikepacking, since off-road it is vibration rather than rain that ends a pannier.
What We Would Do Before the Next Trip
Find three numbers and write them down: your rack's published rating, your frame or fork's published mount rating, and the torque figure for the bolts joining them. Use the lowest capacity and the lower torque figure. Then buy a torque wrench reading in single-digit Nm, put threadlocker on the rack hardware, carry spare M5s, and check the bolts by hand at every resupply.
That is the whole discipline, and it costs less than a rack. The ratings are not the enemy; the gap between the one number you read and the three you did not is. For how racks, panniers and mounts fit together across a setup, start with our bikepacking rack and pannier guide.